
I recently purchased the DIY Axxion® Rocker Plate Kit from Traxxion Dynamics®. Here is the full, unbiased review.
What is a Rocker Plate?
A rocker plate is a device that sits under your bike mounted to a trainer. It allows the trainer to toggle from left to right (and in some designs, forward and backward) to better emulate the bike movement experienced on the road. Most cyclists incorporate a rocker plate for increased comfort, especially on longer indoor trainer sessions. The plates are becoming more popular, seeing a rapid increase in sales during the COVID-19 quarantine, when riders often found themselves stuck inside. They can be used with smart trainers or dumb trainers.
The Axxion Rocker Plate: Gravity Driven vs. Inflatable
The Axxion Rocker is a 100% gravity-driven plate. A great many rocker plates use inflatable, rubber balls or innertubes placed between two boards in order to control the tilt and to re-center the bike. The Coplate® Rocker and SBR Rockr®, along with many homemade versions use this approach. These work well but add a level of ongoing complexity to keeping the plate balanced. The balls must be inflated to a degree that keeps the rocker plate balanced for even, side to side motion that doesn’t favor one side.
And we all took elementary PE and know what happens to dodge balls after a bit…..they deflate.

Here is an example video of an inflatable rocker plate.
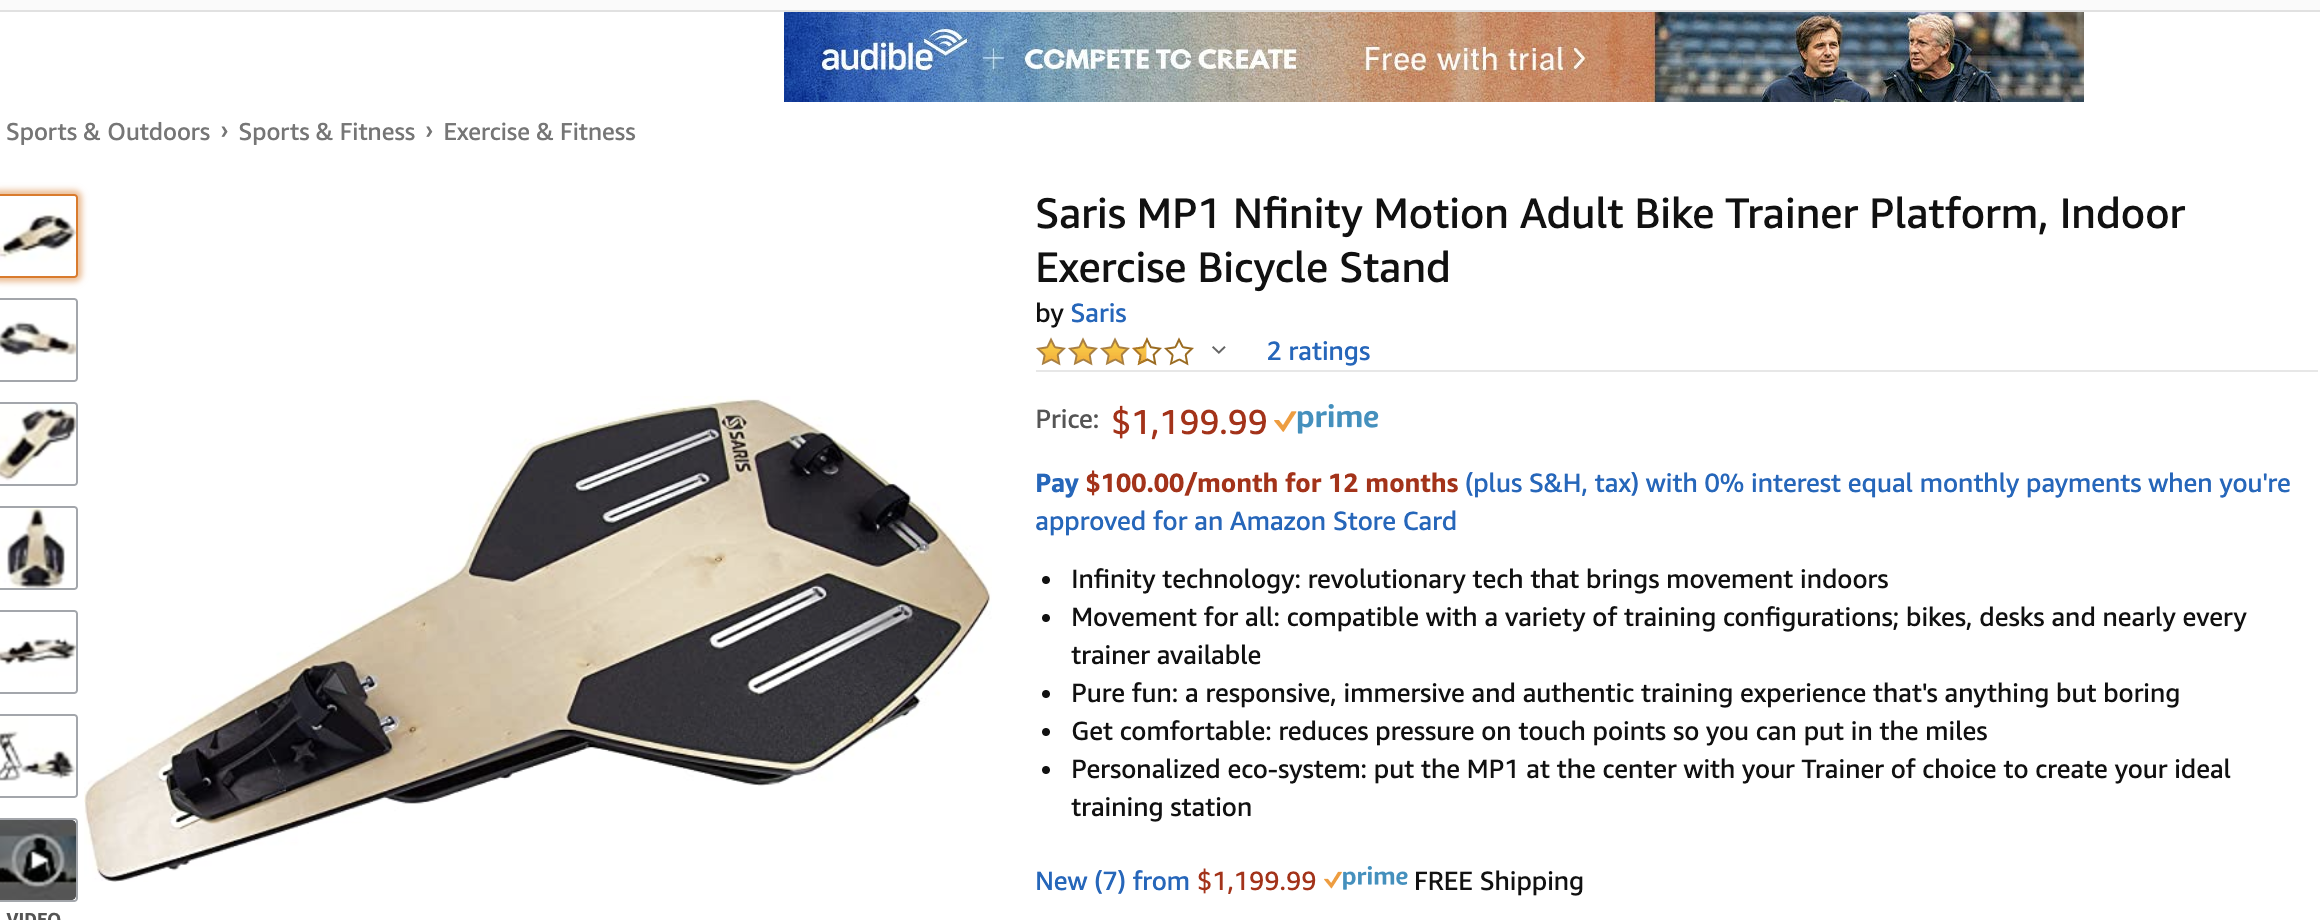
Others, like the Saris® MP1, also uses a gravitational system for fore-aft movement and leaf springs for side-to-side movement. The Saris also costs a ridiculous amount of money, more than some trainers, at $1,199 USD. (aka the plate formerly known as the Cycleops rocker plate).
The advantage of an inflatable rocker is that many allow for a slight forward to back movement, as well as left and right, but more about why that was less important to me later.
At MeatMotor, we feel the simplest solution is often the best. So a fundamental question we had when we started researching rocker plates is why inflatables? That seems to introduce some needless complexity when we have our good friend gravity available to us 24/7/365.
So we set out to find a plate that would be:
- comfortable (the #1 reason to incorporate one is butt comfort).
- affordable (aka spousal unit approved).
- simple to hop on and off with little to no maintenance or adjustments (Hey, we’ve all rushed up 2 minutes before a Zwift or RGT race praying our app syncs before the race starts, only to go from zero to the typical 500w start with no warm-up).
- gravity based with no inflatables; see the point above.
- shipped quickly (aka wouldn’t take our order 10-weeks to arrive.)
Enter the Axxion Rocker plate. It was recommended as meeting our criteria on a Facebook group called “Rocker Plates” started by Chad McNeese devoted entirely to the subject at hand.
Decision to Purchase
After looking over the site, you realize this company has two passions, motorcycle suspension and indoor cycling. The founder, Max McAllister, appears to be a stickler for detail and fine craftsmanship. You can see that from watching their YouTube videos about the Axxion on their channel. This dedication to craftsmanship made us pretty confident in our purchase decision.
Purchasing & Shipping
This is where the Axxion stands apart-great customer service.
Max had me call him directly, walked me through the pertinent questions, and advised me on the build. Max asked me if I used a Kickr Climb with my trainer. I don’t currently. He said I could easily use a rear only rocker, since my front wheel would rock in tandem with the rear of the bike.
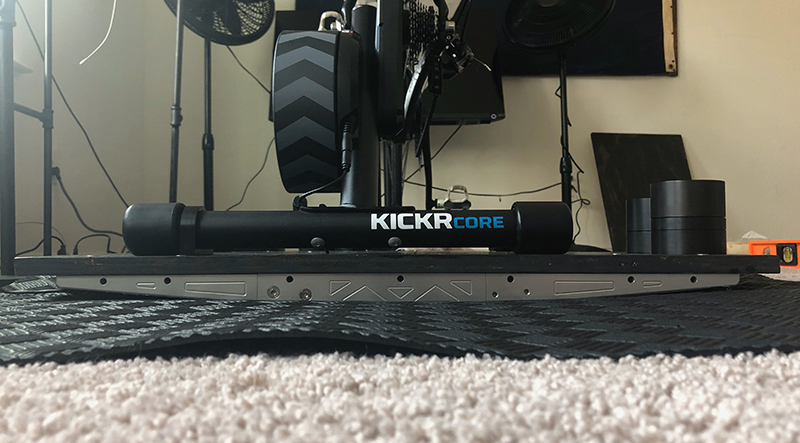
He asked what trainer I used–Wahoo Kickr Core–to ensure the right mounting kit and template were included. They have kits for almost every trainer including the Wahoo, Tacx Neo, Saris and others.
He asked my height and weight to make sure the right amount of balancing counterweights would be shipped with my order.
He asked what type deck I would be using–3/4″ hardwood plywood. He told me I could go ahead and buy it and get it ripped 30″x22″ for my particular build.
Next, Max gave me a Leprechaun’s pot of gold. He told me to buy a Lazy Susan for my front wheel. More on this later in the review.
He then took my credit card number and said the order would be shipped out that day.
I ordered it on a Monday and received it on Thursday….that’s FAST in the current COVID scenario.
What’s Included
The Traxxion folks have thought through everything when it comes to rocker plates and design. My package arrived and included:
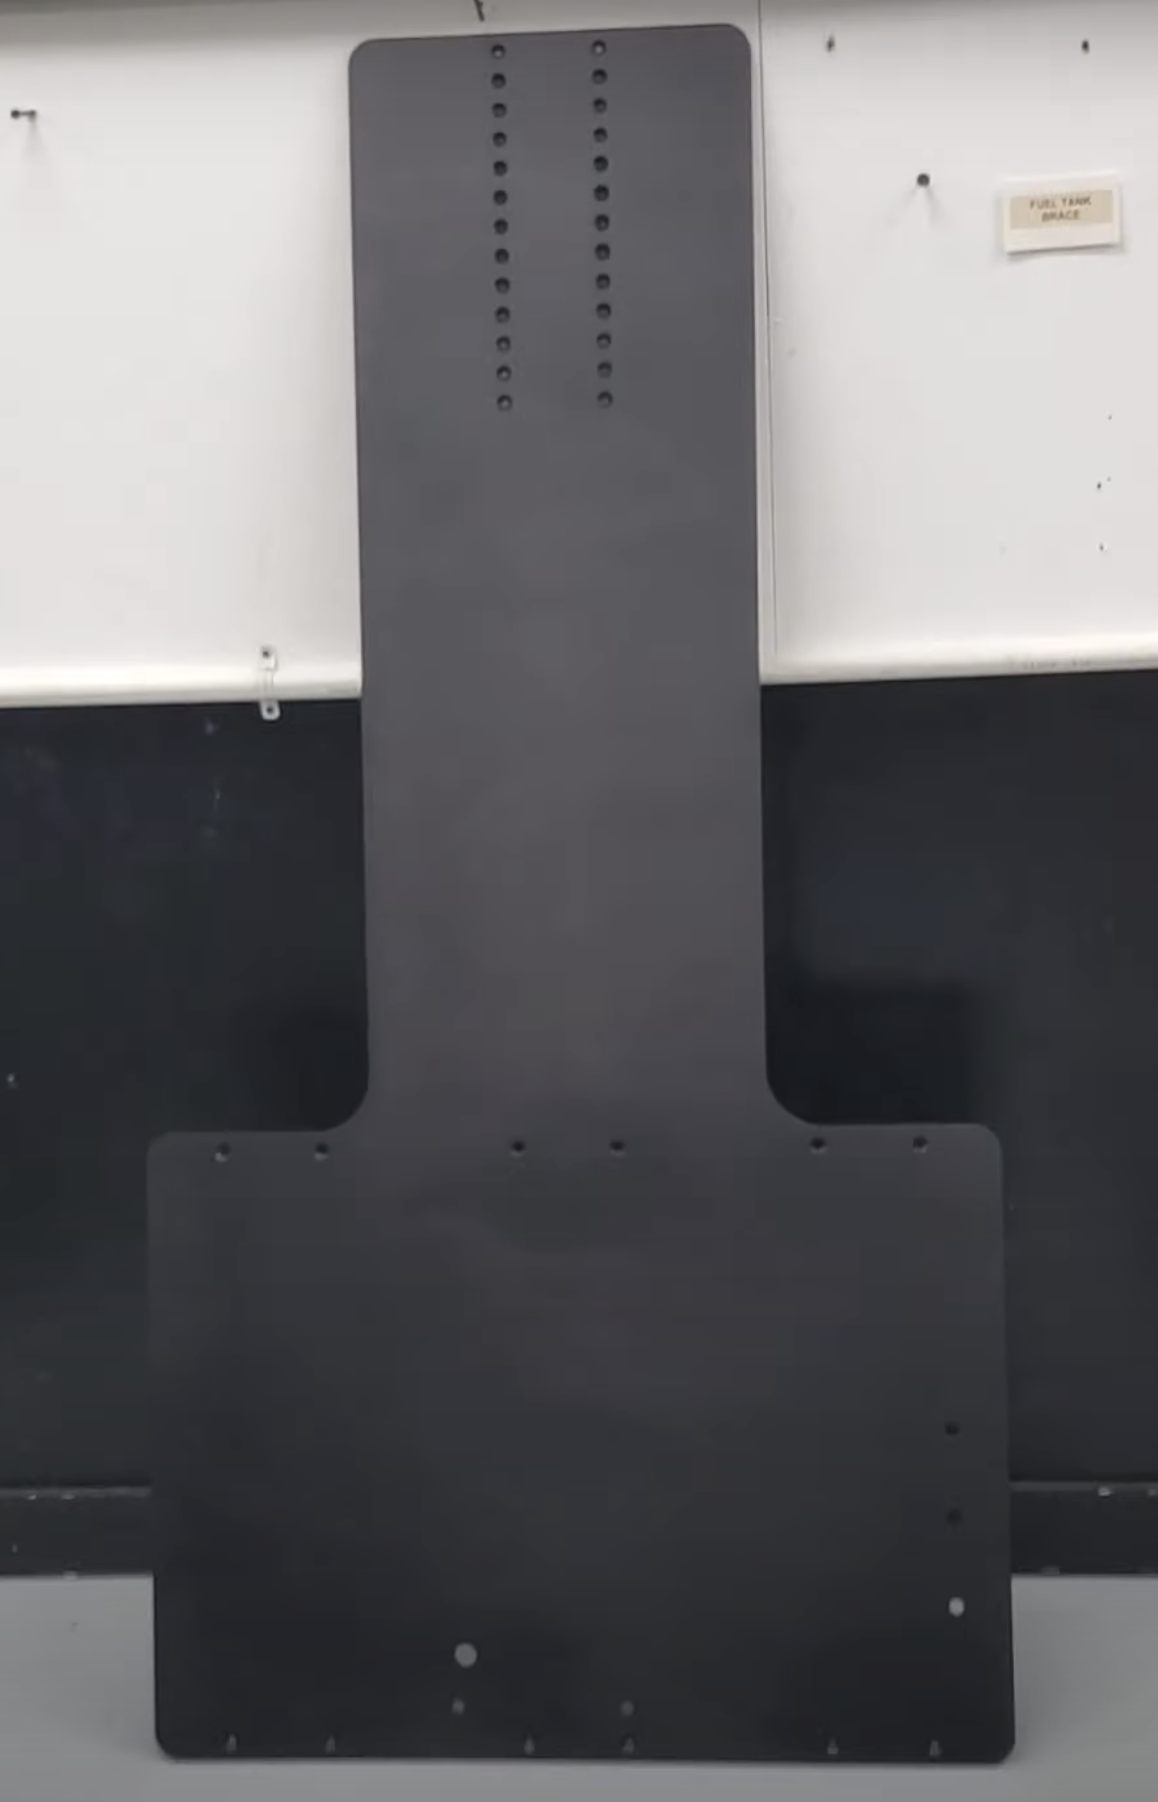
- two-curved, highly engineered metal curved bars aka ribs (in three easy to assemble pieces each for easier shipping)
- a Kickr Core template printed on thick paper.
- the mounting clamps to hold the smart trainer on the board platform securely (important for my semi-massive attacks 1 mile from the finish since I am a TT’er and not a sprinter).
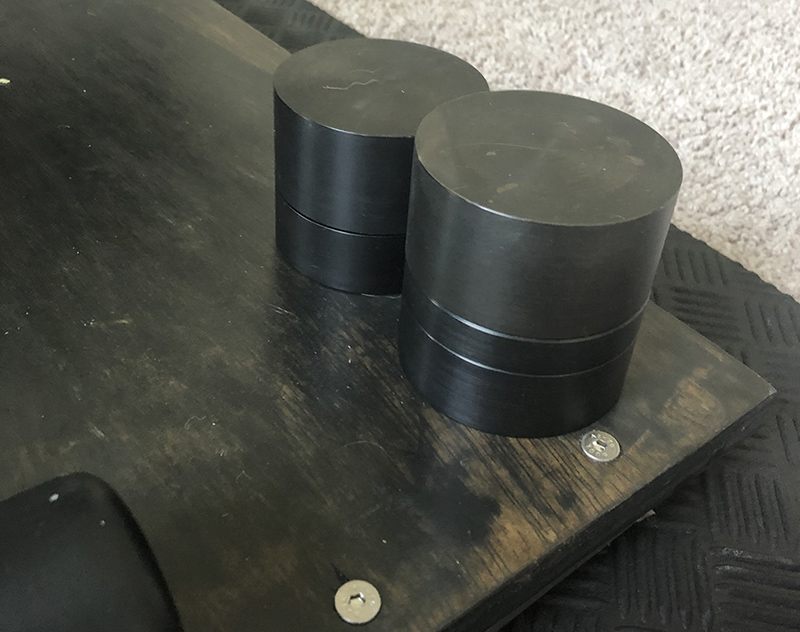
- an ingenious counterweight kit that allows for flexible counterbalancing.
- a wiring kit including zip ties for a clean power cable run (and ANT+ cable run if needed, I use Bluetooth for Zwift).
- gaffer’s tape to protect the floor and braces if you are on a hard surface.
- all the screws needed.
- two Traxxion stickers (who doesn’t love stickers, right?).
The DIY Build
I grabbed the template and my piece of plywood and headed to the garage. You simply measure to find the center line on the board and mark it. The template has notches to cut out to make sure your template is centered exactly on the board.
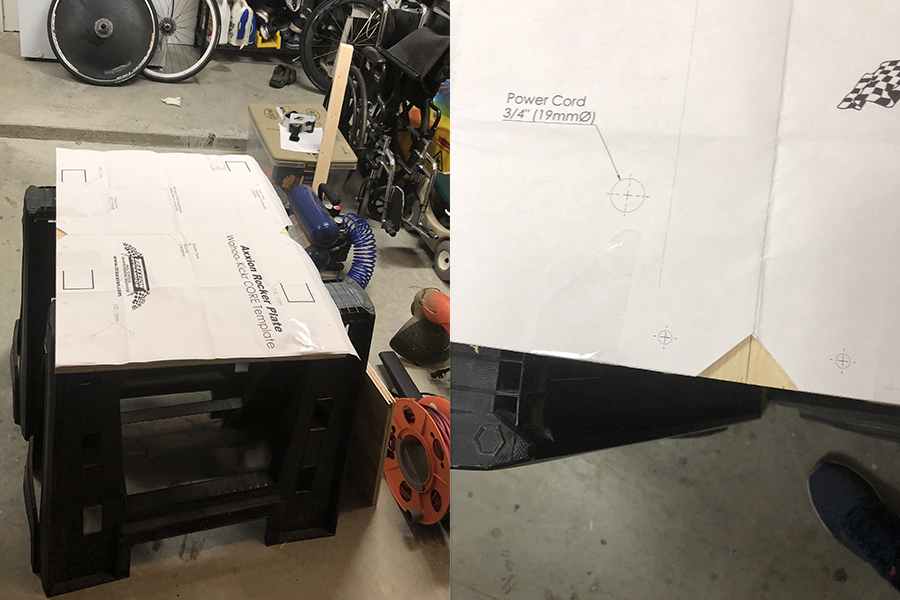
Next, I followed the recommendations on the template and drilled the recommended 1/8″ pilot holes everywhere there was a drill point on the template.
It’s important, important, important to make sure you are drilling these holes at 90º. Fortunately, I have a drill brace thingy-ma-bopper that helps make sure this happens. You’ll probably be fine without this, but I didn’t want to take any chances.
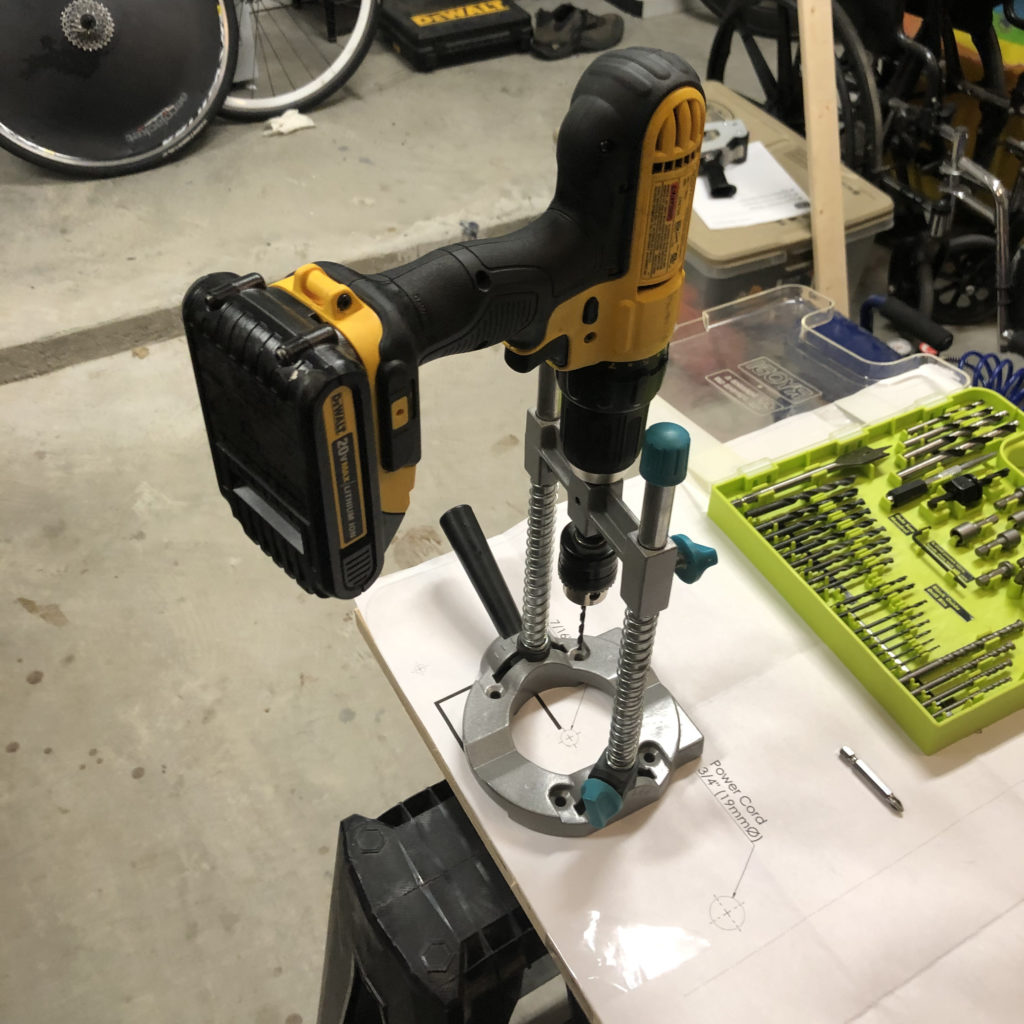
Then, I got out all the sizes of bits needed for my particular template. Uh-oh. Two bits were unique in size so I made a quick Home Depot run to get the 9/32″ and 7/16″ bit. The drilling took a total of 10 minutes minus the drive to HD which included a stop by the hot dog lady’s stand outside the HD door. They tempt you with the onions and it worked–Texas hotlink and polish sausage, please.
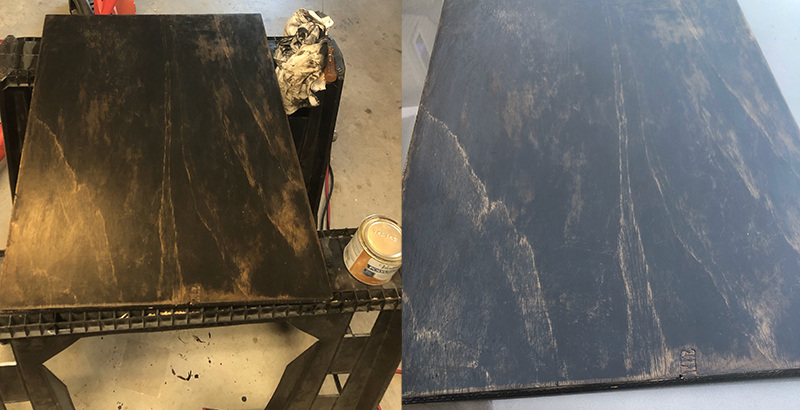
Then it was time to decide how I’d finish my board. I sweat….like a LOT! Like a hippo on an African summer day (Okay, I don’t really even know if hippos have perspiration glands, but if they did, it’d be like that). Also, design considerations were tied into our overall house decor–modern transitional.
For this reason, I opted away from the high gloss paint I see on so many rocker plates. Instead, I wanted what I called an aged-French-cafe-floor look because it:
1) tied into the room.
2) would already appear weathered in case my sweat pooled on it.
So I went with three coats of stain. First, gray, then ebony, then walnut, with random sanding between each to get the weathered look. Then the important part….5 coats of polyurethane to ward of water/sweat/sticky-fuel-spills damage.
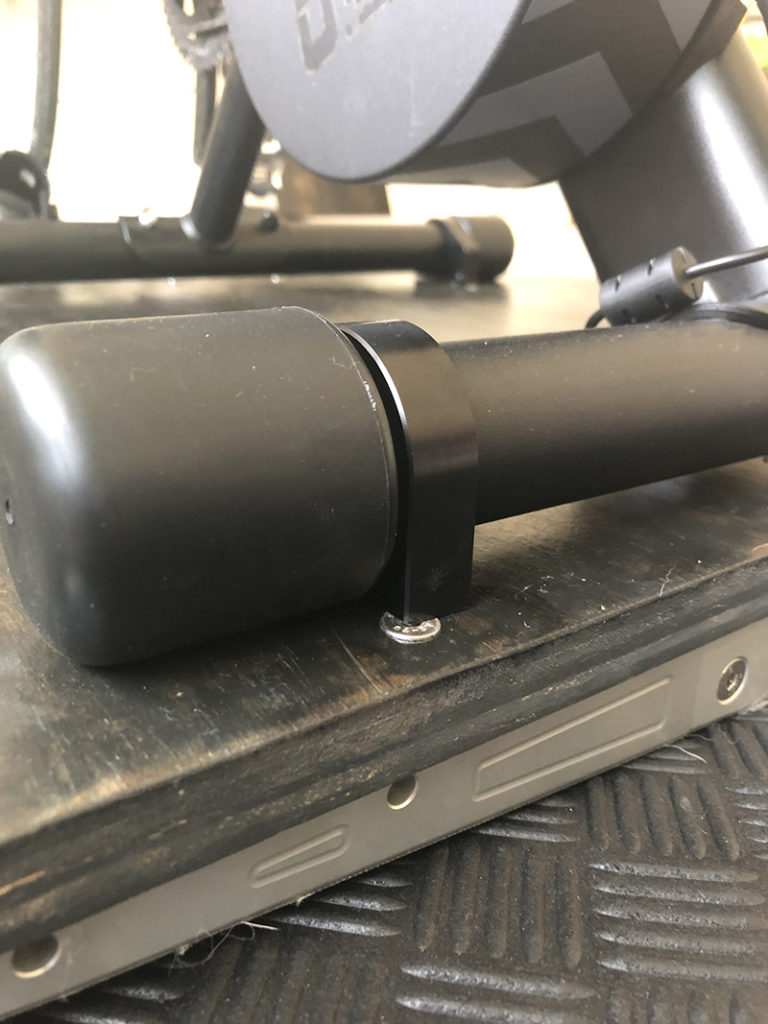
Once I was happy with the board, it was simple to screw on the curved brace ribs. These things are stout and the crux of the system! They are carefully engineered and machine crafted to have the optimal curve for side to side movement for your inside ride.
Next, I installed the clamps onto the leg of my smart trainer. This was fairly easy. Granted the heavy trainer would have made having an assembly partner helpful for this step, but it wasn’t bad. (All the family was out that day. What good are 5 kids if they can’t help you lift heavy stuff? Sigh). Once I got the trainer in position on the board, the clamps held it in place tighter than Dolly Parton’s bra. It wasn’t going anywhere.
The wiring kit is amazingly simple but an effective way to keep the power cable neat and tidy without any risk of pinching it. (As noted, you can also run you ANT+ extender cable through the hole if needed.) It uses zip ties that snap into the curved rib brace. Neat cable runs…check. (See the walkthrough video above.)
Finally, I mounted my Cannondale SuperSix bike (nicknamed Carbona-Sanity) onto the trainer and began the process of dialing in the counterbalance weights. Counterweights are necessary because the flywheel weight of the trainer is off-centered to the left. This was the most time-consuming part, but it still only took about 10-15 minutes. I would guess on the amount of weight, get on the bike and pedal to see if it felt lopsided or not, and then adjusted the weights accordingly. There is nice forethought into both the weight breakdowns so you can really dial it in within a pound and the method of attachment where all bolts remain hidden.
Here is a walkthrough video of the finished project.
The Ride Experience
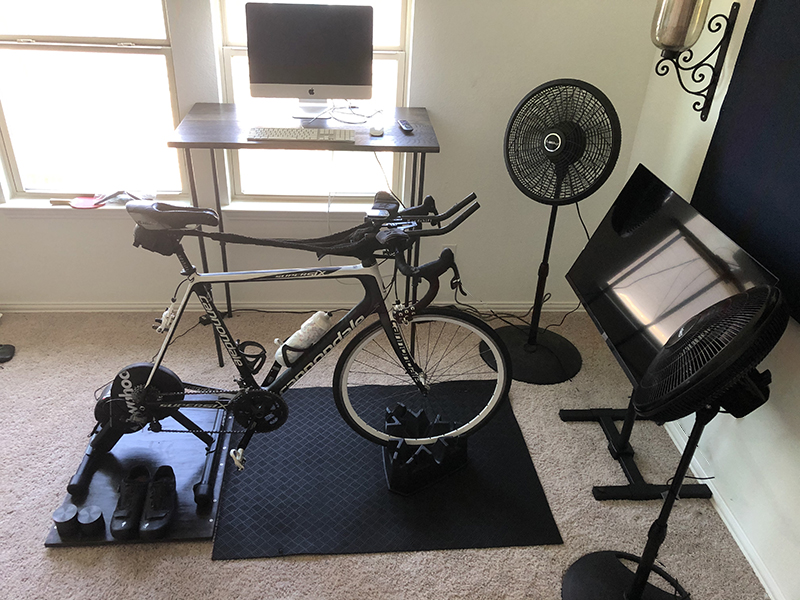
For my virgin indoor cycling experience on the Axxion, I chose to have the curved rib/braces on carpet to slightly reduce the liveliness of the motion.
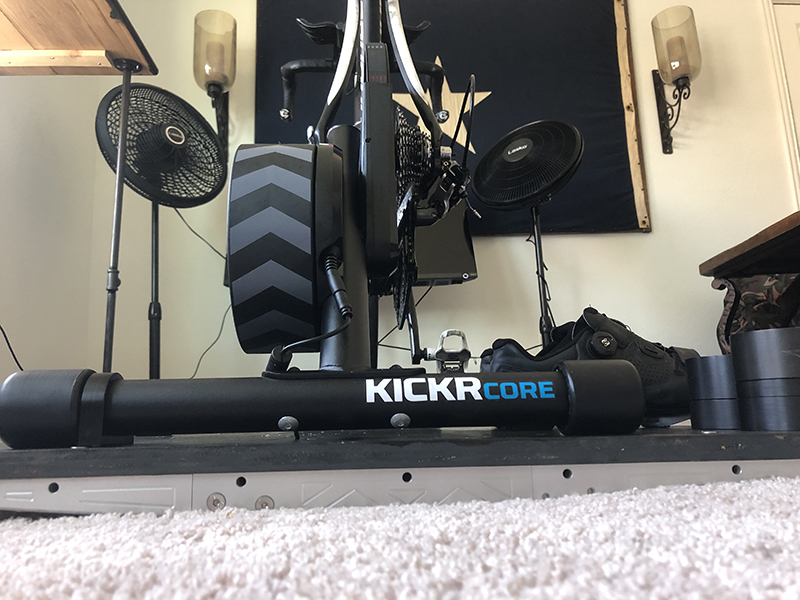
I also chose to have my front wheel in a Cycleops holding triangle for stability. I stood on one side of the plate and pulled on the bike to check the flip factor…..none. That’s a good sign.
Mounting was not precarious at all. Just think “cyclocross remount “and have one hand on the opposing handlebar to provide a bit of counterweight.
It only did a 5-minute spin and knew my confidence was high enough that I could throw caution to the wind and apply the pot of gold. So I moved the front wheel off the Cycleops holder and onto a board with the industrial level Lazy Susan I had purchased. It took a second to get the fore/aft placement of the front wheel onto the Lazy Susan.
I’ve heard people say you need to match the angle of the fork to the Lazy Susan. Hogwash! If you get the wheel dialed in placement wise it works perfectly fine flat (and keeps things simpler, as per one of our values).
And then I entered indoor riding heaven on a Zwift rocker plate ride.
El Butt and Los Manos
I ride and race Ultras. So I am used to a long time on the saddle. I’ve even had a saddle pressure test where my world-class fitter, Craig Fulk, switched out about 10 test saddles. We ended up on the Cobb Randee. No hot spots. Feels dope fly outdoors.
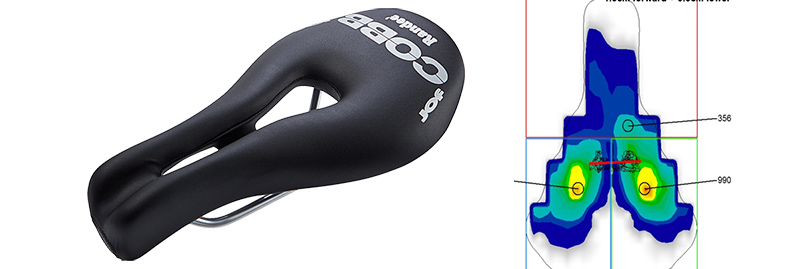
Butt [sic], even with that, riding hours on the fixed, static trainer caused some butt pain and numbness of the hands. I’ve done two 6-hour sessions on a static trainer. Once on a smart bike on a Guinness World Record relay attempt for virtually crossing the USA. I don’t know if the results were submitted properly or not, because I don’t see my name in there when I search it, DRATS! A second was on my Cannondale SuperSix and the previous dumb trainer I had (Cycleops Fluid) with no cycling app, just a power meter and Garmin head unit…..BORING! So I know trainer butt pain and the mental fatigue of static trainers well.
Comfort Report on a Long Session
I sailed off on an initial 3.5 hour Zwift session on the Axxion and guess what…….no butt numbness or hurting to speak of and no hand numbing. The interaction between the side to side movement of the Axxion and handlebar movement on the Lazy Susan was the ticket to improved comfort and extended indoor training time. The motion seemed much much more akin to road cycling, requiring the inclusion of core stabilizing muscles and the shifting of pressure on the saddle as the bike rocked.
I will say that Max got the curvature of the ribs RIGHT!
That curvature is the most important element of this whole set-up. If the curvature was not proper, the experience would be poor, with overtipping or under-movement. Fortunately, Max’s engineering acumen comes into play. Traxxion got the curve, in my opinion, exactly right. And because the ribs are made of metal, the curve won’t wear down like it might with a wooden rib. I am foreseeing this rocker plate lasting a lifetime.
Caveat 1: I am an in the saddle rider. Whether on the hoods or aerobars, I rarely stand except to stretch. I don’t climb like Cantador but like Froome, seated, albeit not as fast. I also hammer the flats seated when possible with a self-selected cadence of 80-85 rpm. Ulrich anyone? When I did stand to see what it was like on the climb or sprinting, it is a strange sensation. The Axxion, as will ANY rocker, will go opposite the way your bike goes in real life. The plate goes down on the downstroke of your pedal. This is not how things work in the real world. IRL, your bike leans opposite of your pedal stroke. On the rocker, you’ll have to learn to push on the bars against the downstroke. Not the end of the world, but definitely a learned habit. For me, it isn’t a big deal since you don’t see this effect when seated.
Caveat 2: I have not ridden an inflatable rocker plate. The additional front to back movement some of these provide is probably nice. But granted caveat 1, it would do me little to no good. I’ll take the simplicity of a well-designed curve and gravity any day.
The Surface Under the Ribs Experiment
I tried placing another board under the rear plate ribs. The harder surface definitely gave the rocker livelier action and quicker to shift side to side with any movement. I wanted a middle ground between the carpet experience and the hard board experience. So I bought another rubber mat from Home Depot (I should get sponsored by them), and placed it under the Axxion. For me, this was the best level of liveliness and what I’ll most likely stick with.
Sweat Patterns
Even with two fans full blast, hardly any sweat hits the rear plate. That’s good news. It does hit the front wheel mount, so make sure that board has plenty of sweat protection (polyurethane, sealant, etc.).
Axxion Rocker Plate Price / Costs
The Traxxion price for the Axxion Rocker Plate DIY Kit was $324.85 including everything I needed minus the board and drill bits. This includes shipping costs.
The Lazy Susan is an industrial-grade product holding up to 200 lbs (90.7 kg) and plastic-rubber sweat proof. We got it here on Amazon for $12 USD. Even if you are heavy, remember that not all your weight is on the front wheel. The old but not entirely proven adage is 55% on back wheel, 45% on front total rider + bike weight would have to be 310+ lbs (140.6 kg).
The plywood was affordable. I went with a hardwood plywood to reduce any potential flex and because it would take stain better. I am sure regular old plywood will work fine, too. I am just a build-it-once, over-engineer-it type personality.
Additional Options
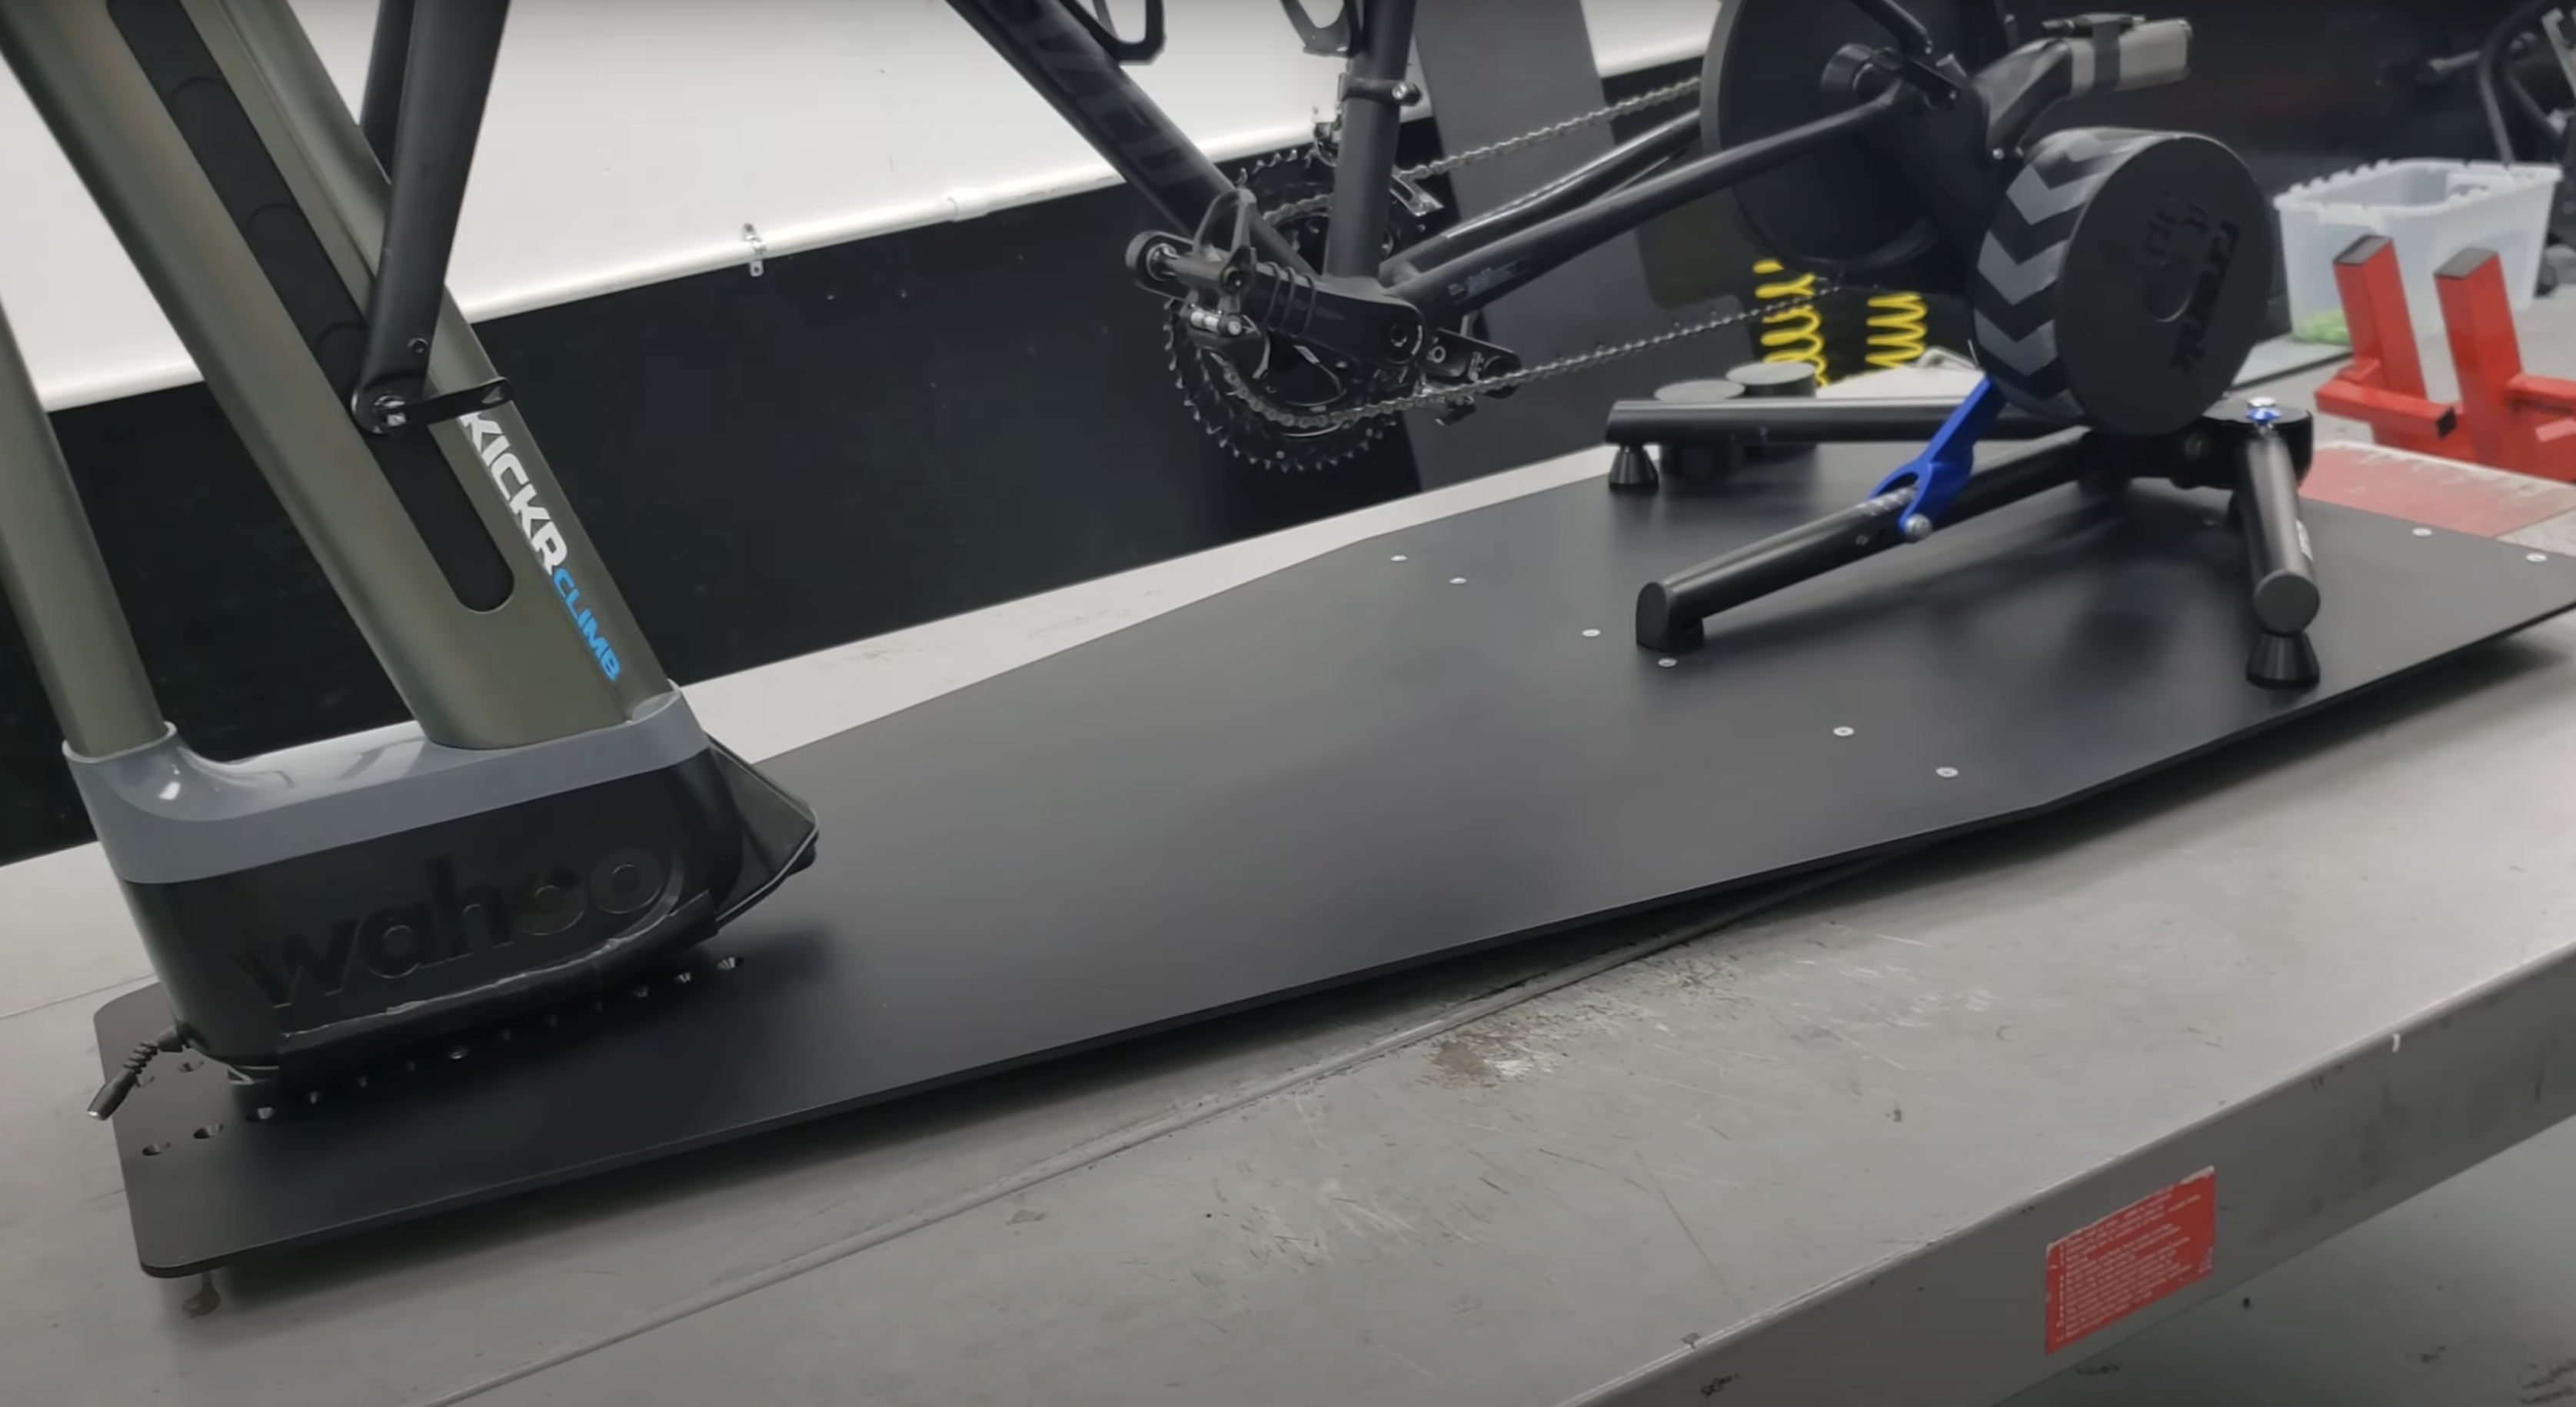
Full Length Plate
I chose a rear only plate, but if you use a Wahoo Climb, you can easily create a full-length plate. You’ll need this since the Climb will need to rotate with the rear. If you don’t, a rear only is fine because your front wheel is curved and will rock in sympathy with the rear. All you need for the DIY version is a full-length template, a bigger piece of wood, and an additional partial rib ($49).
Multiple Trainer Compatibility Templates
Traxxion have a mounting system and template for all the major trainers on the market.
- Wahoo Kickr
- Wahoo Kickr CORE
- Wahoo Kickr SNAP
- Tacx NEO
Even if you don’t see yours, reach out to Max and he can probably come up with a solution.
Built For You
I chose the DIY version because I was pretty comfortable with how easy it would be to assemble. If that scares you, or you are an all-important big-whig executive who has no spare time, they’ll build the entire thing for you.
Aluminum Deck
I like to over-engineer things. But if you REALLY want to go all out, Traxxion has a 6061 aircraft aluminum plate you can order instead of using plywood. They rear-only or full-length plate comes with holes for your model of trainer pre-drilled. The full-length version looks like an aircraft carrier that you could land a fully armed fighter jet on with no issues. Zero flex and rustproof. Full length aluminum Axxions cost ~$800 with two shapes available.
I chose to save on costs. Worst case scenario, years from now, I can just reattach everything to a new piece of plywood. But if you want a bullet-proof plate, by all means, go for it.
Parting Thoughts
Rocker plates are where the kool kids are in terms of indoor cycling. I suspect they will become a growing part of people’s indoor pain caves, because they reduce the type of pain that doesn’t help us become faster cyclists.
I would buy the Axxion 10x over. The ability to increase riding time is important to my fitness and racing success. The tilt and handlebar movement I have available is a fantastic improvement.
Whether you race weight dopers in Zwift, like the realism of RGT, the no-frills-necessary of TrainerRoad or Sufferfest, or the likes of Bkool or Rouvy or the forever promised Veloton app, rocker plates make for a better experience.
I probably need to try a rocker plate that has some additional fore/aft movement as a comparison, but the comfort gained from side to side was substantial. It would be interesting to see how much more fore/aft helped since I am a saddle sitter.
Yes, you could buy smart rollers, but there is then the danger you’d fall through a second story or higher window with any lapse in concentration. Plus, right now very few vendors have them in stock. Also around $900 USD.
I looked at the E-flex system but it only fits a regular Kickr currently and that’s not what I have (Kickr Core).
I almost got the Saris, but then my Dave Ramsey brain kicked in and thought, “Over $1000. That’s a crazy amount of money to spend on a rocker plate, and I’ve got four, yes four, kids in college currently.” I’m now glad I didn’t.

Axxion Rocker Plate Review Rating: A solid value. 4.9 out of 5 rating from MeatMotor.
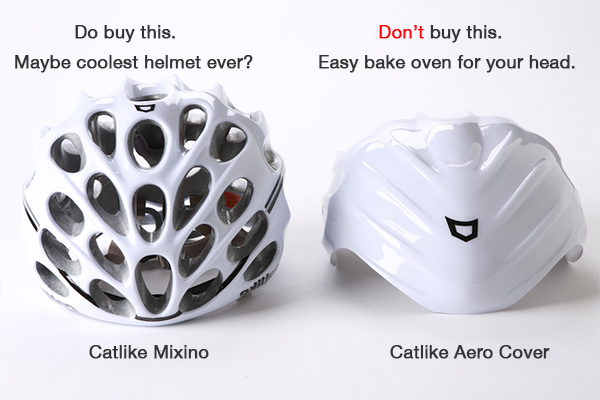
Ease of ordering, fantastic customer support, simple assembly, great design and accompanying hardware, and a vastly improved indoor riding experience make the Axxion some of the best cycling money I’ve spent. (And I’ve spent a LOT! Definitely better than the Catlike Whisper Aero Cover that turned that helmet into the Easy-Bake-Oven-of-Death.)
How to Order Yours
I spoke with Max AFTER THIS REVIEW WAS 100% WRITTEN WITH NO INFLUENCE. He was grateful and is allowing express order requests as a favor to Meat Motor. Just complete the form below and Max will move you to the first of the line and get back with you ASAP for your walkthrough order phone call.

Jordan Fowler has experience as a head swimming coach of the Frisco Swim Team, a TAAF-awarded coach, a track and field distance running consultant for select Texas High School runners, and has competed as a triathlete, road runner, and cyclist. Though he is remarkably slower than he was in his 20s and 30s, he still enjoys endurance sports and sports science studies.
Jordan Nice write-up, have you noticed issues with the front Lazy Susan and board set-up causing the bike to be un-level with the board/rocker on back?
My current set-up is Wahoo Core on Wahoo mat so the rocker would be on a stiff mat surface and seems you like that OK. Just concerned over front level issue, don’t up to ride uphill all the time unless Zwift is count it! Need something with movement as I can only stand 1 hr on trainer / Zwift and not fond of the inflatable ball setups. Also too hot in Dallas to be out there until late fall.
I am a bit anal-retentive, so I:
1. I put my iphone level on the top tube with wheels on. I noted that angle.
2. I put the Kickr Core on the floor with bike attached and front wheel on and saw if the angle changed from the fact that is was mounted on the Kickr.
3. I then knew if I needed any correction merely from the bike being on the trainer itself.
4. Next, I measured the height of the completed rocker plate and noted it.
5. Finally, I measured the height of the lazy susan and calculated how much lift I would need from something under the lazy susan to equal IRL. (Total height of rear rocker plate +/- adjustment needed on flat floor only = x. Lazy susan height = Y. Thus, X-Y = Z amount of board height under front wheel needed.)
I built the front platform Z height. Well, not really see note below.
Here’s a trick though. I actually underbuilt the front platform height by 1/4″. I have a 1/4″ board I can slip under it to make it level. Then on super long trainer rides I can remove a board and be slightly front wheel down or add two boards and be “climbing” ever so slightly. This slight change really moves the saddle pressure around and helps me go longer when training for ultras.
Also, I live in Fort Worth, TX so I GET THE HEAT! I am doing a 212-mile race in September in Glen Rose, TX and it will be like HADES most likely. Gotta get out in it to get acclimated. I use indoors for recovery or I can’t take another day of heat days. ha!
Good review. Actually, excellent! I’m reading this as my Axxion parts shipped today. Max was a big help and a super guy. Your review confirms I made the right decision. Cheers, Jeff
You are going to love it. So much of an improvement in comfort.
how must for kit to do it your self i have Lamond trainer
I’ll connect you directly with Max so he can dial it in exactly how you want it.